
 The hidden Control Center screen remains one of the most useful features on iPhone and iPad, allowing you to quickly access commonly-used settings and apps. It’s especially useful during iPad preflight, allowing you to quickly optimize wireless and network settings before takeoff without the need to leave your EFB app.
You can quickly switch to airplane mode, launch the calculator for a fuel computation or lock the screen from changing orientation when rotated. It’s also the fastest way to adjust screen brightness.
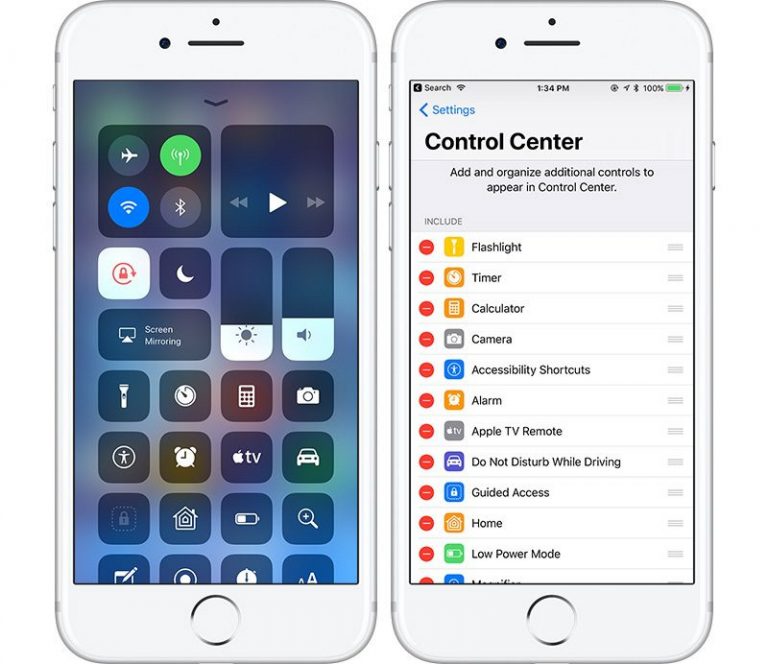
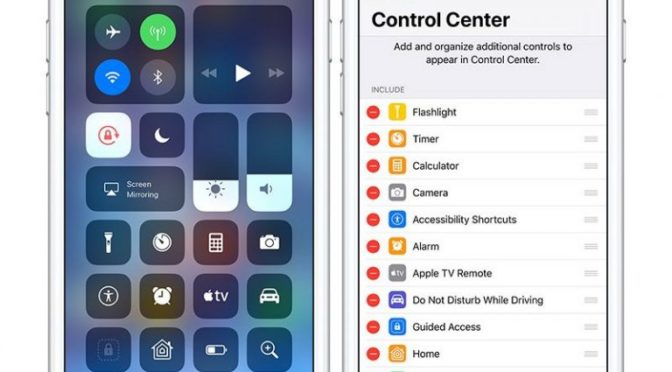
The Control Center has evolved with iOS 12 and is now accessed by swiping down from the top right of the screen. By default, you’ll see just a few settings, but you can add additional functionality here by enabling other controls and shortcuts based on your preferences.
Head over to the main iPad Settings app and select Control Center from the menu on the left side of the screen. Then select Customize Controls, and you’ll see an editable list of functions. The items at the top under the “Include” label are what are presently shown in the Control Center, and additional functions to add are shown in the second grouping. It’s then just a matter of using the + and – buttons to add or remove controls. You can also rearrange the order of what’s shown by pressing and holding on the 3-line button at the far right side of a function and sliding its position up or down in the list.

You can also tap and hold on some of the controls, like the network settings, music controls and screen mirroring to open up additional settings and further control that feature. For example tap and hold on the flashlight shortcut to change the brightness, or the network controls to view Wi-Fi connection details or adjust AirDrop privacy settings.
 There are some functions here you might not have known existed, like iPad screen video recording. This is similar to the screenshot shortcut but creates a video recording of the app action on your screen and saves the video to the Photos app. We had some fun with it last week on a flight to Florida, recording an ILS approach around some convective weather using ForeFlight and the Stratus ADS-B receiver:
Here’s a complete listing and description of each function and what it does:
Accessibility Shortcuts: Quickly turn on accessibility features, like AssistiveTouch, Switch Control, VoiceOver, and more.
Alarm: Tap to set an alarm to wake up.
Apple TV Remote: Control your Apple TV 4K or Apple TV (4th generation) with your iPhone, iPad, or iPod touch.
Brightness: Drag the brightness control up or down to adjust the brightness of your display.
Calculator: Use the standard calculator to quickly calculate numbers or rotate your device to use the scientific calculator for more advanced functions (iPhone and iPod Touch only)
Camera: Quickly take a picture, a selfie, or record video.
Do Not Disturb: Silence calls and notifications. Press and hold to turn on for an hour or until the end of the day. Or turn it on just for an event or while you’re at a location, and it automatically turns off when the event ends or you leave that location.
Do Not Disturb While Driving: iPhone can sense when you might be driving and will silence calls, text messages, and notifications. People trying to reach you are notified that you’re driving.
Flashlight: Turn the LED flash on your camera into a flashlight. Press deeply or press and hold the flashlight to adjust the brightness.
Guided Access: Use Guided Access to limit your device to a single app and control which app features are available to use.
Hearing Aids: Pair or unpair your iPhone, iPad, or iPod touch with your hearing aids.
 Home: If you set up accessories in the Home app, you can control your favorite home devices and scenes.
Low Power Mode: Switch to Low Power Mode when your iPhone battery is low or when you don’t have access to electrical power.
Magnifier: Turn your iPhone into a magnifying glass so you can zoom in on objects near you.
Night Shift: In the Brightness control, turn on Night Shift to adjust the colors in your display to the warmer end of the spectrum at night.
Notes: Quickly capture an idea, create a checklist, sketch, and more.
Rotation Lock: Keep your screen from rotating when you move your device.
Scan QR Code: Use the built-in Camera on your iOS device to scan a QR Code to quickly access websites without having to type or remember a web address.
Screen Mirroring: Stream music, photos, and video wirelessly to Apple TV and other AirPlay-enabled devices. Learn what to do if you don’t see AirPlay.
Screen Recording: Tap to record your screen. Press deeply or press and hold Screen Recording and tap Microphone Audio to use your device’s microphone to capture sound as you record.
Silent Mode: Quickly silence alerts and notifications that you receive on your device.
Stopwatch: Measure the duration of an event and track lap times.
Text Size: Tap, then drag the slider up or down to make the text on your device larger or smaller.
Timer: Drag the slider up or down to set the duration of time, then tap Start.
True Tone: In the Brightness control, you can turn on True Tone to automatically adjust the color and intensity of your display to match the light in your environment.
Voice Memos: Create a voice memo with your device’s built-in microphone.
Volume: Drag the volume control up or down to adjust the volume for any audio playback.
Wallet: Quickly access cards for Apple Pay or boarding passes, movie tickets, and more.
The post How to customize the Control Center on your iPad and iPhone appeared first on iPad Pilot News.
Source: Ipad appsHow to customize the Control Center on your iPad and iPhone