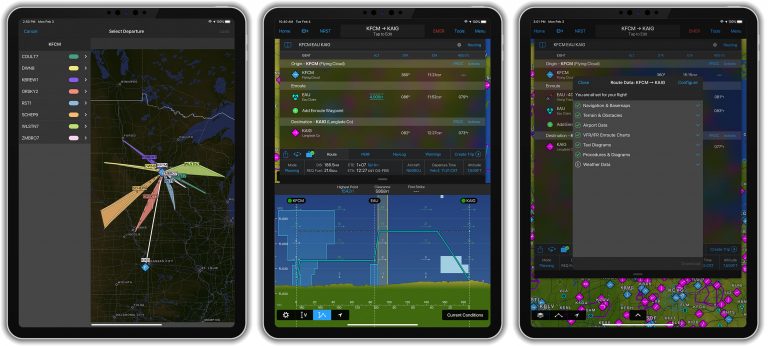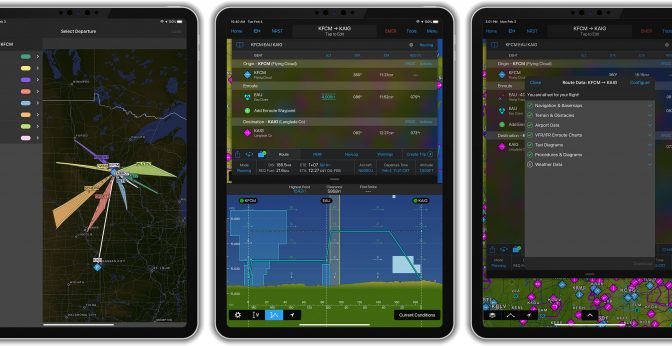
In the never-ending battle between ForeFlight and Garmin for electronic flight bag supremacy, the two companies have taken slightly different approaches. ForeFlight, for example, has long focused on ease of use and a steady pace of new features that don’t fundamentally alter the app’s look and feel. Garmin, on the other hand, has played to its strength by making their Pilot app more and more like their industry-leading panel avionics.
The latest Garmin Pilot update, version 10, continues this trend, with design changes and feature additions that will feel familiar to anyone flying with a GTN 750 navigator or a G3000 glass cockpit. Most of the changes have to do with the route and flight planning tools, specifically on the Map page. That might sound simple, but the changes are significant, especially for IFR pilots. In fact, it’s one of the biggest updates in recent years.
New flight plan layout
To see the new tools in action, go to the Map page and tap on the route preview at the top of the screen. This will bring down the route planning window, with the familiar route search box at the top. You can type in your flight plan here (e.g., I69 KOSH) and the app will auto-fill your departure and destination in the route window below. But you’ll also notice new options, including specific Origin, Enroute, and Destination sections. This makes it more intuitive to create a complicated route, and it essentially imports most of the features of the Flight Plan page into this one window.
There are lots of options to explore here. For example, you can tap on the data headings to change what the app displays (e.g., DIS LEG, for leg distance, can be changed to DIS REM, for distance remaining to destination). There’s also a new Actions text button next to the Origin and Destination airport, which gives you quick access to airport information or changes to your desired airports. The familiar Routing option is still there, showing popular routes between your airports, as are the options for departure time and altitude at the bottom right.
At the bottom of this window, additional buttons offer more detailed information. Tap on the PERF button to configure aircraft performance values (to ensure accurate time en route estimates), NavLog for a detailed navigation page for your entire flight (including distance and fuel estimates), or Warnings to see the highest obstacle (very helpful for helicopter pilots). Finally, you can tap Create Trip to send this new route to Trip Planning page and save it.
There are also separate Planning and Navigating sections, a welcome change in our opinion. By default, you’ll start in the Planning mode, meant for pre-flight work on the ground. When you’re ready to fly, tap the button and it will switch to Navigating. This changes to the familiar Garmin navigation view, showing the active leg with a magenta arrow and adding more instrument approach options (see below).
Instrument procedures

Another change to the flight planning page is the ability to load full instrument procedures, including arrivals, departures, and approaches. While you obviously can’t use your iPad to fly an LPV approach to 250 feet, the software features are basically the same as a panel-mount GPS so it’s a great backup. From the flight plan page, tap the PROC button next to the origin or destination, then load the procedure and transition you want.
For a SID or STAR, a new visual procedure selection tool makes it far easier to pick the right one. Tap PROC, then tap Select Departure/Arrival. You’ll see a list of procedures but also an option to Select On Map. This will pop up a full-screen view of the various procedures, much like ForeFlight’s Procedure Advisor. It’s easy to see which one might apply to your route. Tap on one to add it to your active flight plan.
Beyond arrivals and departures, Garmin Pilot now offers powerful approach profiles. Tap PROC and then Select Approach. From here you can pick an ILS, LOC, or RNAV approach, complete with initial fixes or vector-to-final mode. Loading an approach will add it to the flight plan and automatically add altitudes for each leg. It will even add published holds to the missed approach segment. In flight, when you’re in Navigating mode, you can tap on PROC to activate an approach or activate vector-to-final, just like you would on a GNS or GTN series navigator. Note that instrument approaches are available in the US, Canada, and Latin America.
Altitude constraints

The last major planning piece to be added is the third dimension, altitude. Garmin Pilot now allows you to add altitude constraints to any en route waypoint, a great feature that mirrors the latest version of the company’s GTN software. Tap a waypoint in the flight plan view, then tap Add Altitude Constraint. You’ll be presented the option to pick whether it’s a climb/descent, MSL/flight level, and altitude. When you tap done, the new vertical navigation will be added to your flight plan and displayed in the ALT column.
You can even add an Along Track Offset waypoint. For example, if you’re cleared to “cross 20 miles south of GAVNN intersection at and maintain 10,000 feet,” Garmin Pilot can add a waypoint that shows GAVNN minus 20 miles. From there, you can add an altitude constraint.
All these new tools are helpful for reviewing terrain clearance, en route weather conditions at altitude, and for getting the most accurate time and fuel estimates—especially if you plan to step climb or change altitudes during a long flight. However, it’s worth pointing out that this isn’t quite a full VNAV tool, at least not yet. You can put in a crossing restriction, but don’t expect any vertical guidance.
In fact, the best way to use the altitude constraints is with the Profile View on the split screen. This will show your flight from the side, complete with terrain and weather. We use this a lot when avoiding icing conditions, since you can overlay the forecast icing at different altitudes. At a glance, you get a great feel for the 3D weather environment.
Pilot-defined holding patterns
Another powerful tool for IFR pilots is the ability to create a holding fix almost anywhere, including at an existing navaid or intersection, or by creating a user-defined waypoint. Once again from the flight plan window, tap on a waypoint, then tap Hold at Waypoint. You’ll have options to select the inbound course, right or left turns, and either leg time or distance. Tap Done and this hold will be inserted into the active flight plan.
Route data packages

Given the growing options for IFR procedures, Garmin has added a welcome feature to make sure you have all the data you need to fly them appropriately. At the bottom of the flight plan window, you’ll notice a suitcase icon. If you haven’t downloaded all the required databases for your planned flight, you’ll see a yellow symbol. Tap this to bring up the Downloads Needed window.
This all-in-one download manager, reminiscent of ForeFlight’s Pack feature, offers one-tap updates to navigation data, approaches, SafeTaxi, terrain and obstacles databases. The app shows an estimate of the total download size. To edit your database preferences, tap Configure. This allows you to select each type of database, from VFR charts to runway diagrams, so if you’re changing from a VFR to and IFR flight you may want to double check your settings.
Finally, version 10 adds integration with the new GI 275 Electronic Flight Instrument. The app can share GPS position and attitude information, sync flight plans for a GPS 175, GNC 355, or GNX 375, plus take advantage of Database Concierge, Garmin’s wireless update feature.
So far these feature additions are for iOS devices. Garmin often follows with Android updates a few months after the iOS version, but nothing has been announced yet. A Garmin Pilot subscription starts at $74.99.
The post Garmin Pilot adds powerful IFR features with version 10 appeared first on iPad Pilot News.
Source: Ipad appsGarmin Pilot adds powerful IFR features with version 10

