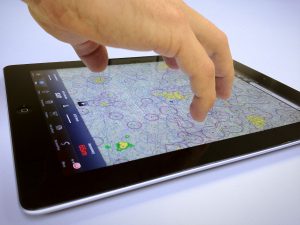

One of the iPad’s defining characteristics is its touch interface. But while most pilots understand how to tap on an icon to open an app, there are a number of other gestures you can use to save time or unlock additional features on your iPad. Once you get proficient with them, they can really save time in the cockpit. Let’s review all the options.
- Swipe up for control center – The Control Center provides quick access to some of the most commonly-used settings, including Airplane Mode, WiFi, Bluetooth, and screen brightness. Just swipe up from the bottom of the screen to display an overlay with these buttons. This is a great way to make configuration changes when you get in the airplane.
- Swipe down from top for notifications and today – Did you get an alert and want to review it? Swipe down from the top of the screen to see a list of all your notifications, whether it’s a new email or an expected route from ForeFlight. After swiping down, you can also swipe from left to right to display the Today view. This is helpful because this view includes widgets, the little apps that run in self-contained boxes here.
- Swipe down from middle for search – Most people learn this one by accident, but it can be useful if your iPad has a lot of apps. Swipe down from the middle of the screen and you’ll see a gray screen with a search box at the top. You can use this to find an app that’s hidden in another folder, a contact, or even search the internet. Tap cancel at the top to return to your home screen.
- Swipe from right to get split screen – This is only available on newer iPad Pro models, but it’s a powerful feature. While an app is open, swipe from the right side of the screen to display a second app in a 1/3rd screen overlay. Your most recently used app will show up first, but you can swipe down from the top of the screen to view a list of compatible apps. Some apps go a step further and allow a full split-screen view, with two apps side by side. To view this, first swipe from the right to display a second app, then tap the left edge of that slide-over window and drag it left. You should see your original app resize and both apps will be active at the same time.

Besides these shortcuts, there are a number of gestures that require four or five fingers – Apple calls them Multitasking Gestures. To activate this functionality, go to Settings -> General -> Multitasking. The first setting will enable the split-screen app option mentioned above. The last one (Gestures) enables the following shortcuts:
- Pinch to the home screen – Use this instead of pressing the home button to access the home screen from within any app. Place four or five fingers spread out on the screen, and pinch together.
- Swipe up to multitasking – Use this instead of pressing the home button twice to access the multitasking view. Place four or five fingers spread out on the screen, and move your hand upward.
- Swipe up with four fingers to close multiple apps – Once you’ve opened the App Switcher (what Apple calls this screen you get after doing the above gesture), you can close apps that are running in the background by swiping up. This doesn’t delete the app, it simply closes it down completely. However, you can close multiple apps at the same time by swiping up with four fingers. This is handy if you want to close all open apps, which is useful if you’re trying to troubleshoot.
- Swipe left or right between apps – This allows quick movement between applications that are currently running. With an app running, place four or five fingers spread out on the screen. Now, move your hand to the left to switch to the last opened app. With the same motion, move your hand back to the right to switch back to the previous app.
Source: Ipad appsUnderstanding all the swipe gestures on your iPad