As ADS-B receivers have added features over the years, they have become much more than just weather receivers. The latest generation, including the Sentry from ForeFlight, offers subscription-free weather, traffic, GPS, backup attitude, pressure altitude and carbon monoxide monitoring. They are now all-in-one iPad companions.
As the feature list has grown, the options and settings list has also grown. In this post, we’ll walk through the various options for configuring your Sentry, so you can get the most out of your investment.
First, turn on Sentry and connect it to your iPad using the Settings app. When you open up ForeFlight, you’ll see a Sentry AHRS setup screen. Select the location where you’ll be mounting Sentry (left window, dash or right window). Next, you’ll have the option to enable “Auto Zero Pitch & Bank”, which will reset pitch and roll automatically when the device detects it is stationary. This will ensure your AHRS is calibrated properly before each flight as long as you power it on while the airplane is not moving, such as before taxiing or when performing before takeoff checks (we’ll cover how to change these settings at another time further down in this article).

You also have the option to manually calibrate the AHRS, which would be necessary when flying a tailwheel airplane with the nose pitched up on the ground.
Then open ForeFlight and tap the gear symbol at the top left of the Maps page to further customize Sentry. Scroll to the bottom of the pop-up menu and tap Sentry under the Devices section. This page shows all kinds of information about the ADS-B receiver, including battery life, connection status, firmware, number of ADS-B towers and more. As you move to the bottom of the page, though, you’ll notice a variety of settings. Let’s explore each of these separately.
 LED Brightness. Sentry has a built-in light sensor that automatically dims the four lights on the front of the device. However, you can manually adjust these at any time with this slider bar. It’s particularly handy for night flights – just slide the bar to the left for minimum. This is particularly helpful when Sentry is mounted in a place that makes it hard to reach.
Logging. This feature is used almost exclusively for troubleshooting, so it should be left off unless a support team member has asked you to turn it on. When on, the app will log all the information sent from Sentry to ForeFlight, which can take up a fair amount of space. Note: this setting is not track logging or a flight data recorder.
Show ADSB Towers. If you want to see where the ground stations are that you’re receiving from, turn this option on then look at the moving map. You’ll see little white towers located on the map, complete with information about the strength of the signal you’re receiving from each tower. Most of the time this isn’t necessary, but it can be helpful in areas of marginal ADS-B coverage.

Use As GPS. This should almost always be set to on, since the highly accurate WAAS GPS in Sentry provides a position source that ForeFlight uses for moving map. However, under some rare circumstances, when weather and traffic are needed but not position, the GPS can be turned off.
Cabin is Pressurized. Sentry contains an internal barometric pressure sensor to drive the flight instruments and altitude alerts in ForeFlight. When flying a pressurized airplane, the pressure in the cabin is much lower than the actual aircraft altitude, leading to inaccurate readings on the digital flight instruments in ForeFlight. By enabling this switch, ForeFlight will leave the “Pressure Altitude” field blank on the maps page and only show an altitude value for the Cabin Pressure option.

Test CO Alarm. Sentry incorporates an electronic Carbon Monoxide (CO) monitor that continually measures the concentration of CO. If CO concentration rises to a Caution level, the CO LED turns yellow and an alert is displayed in the app. If the CO concentration rises to a Danger level, the loud built-in alarm is activated, and an in-app alert is also shown.
To test the CO alarm, tap the “Test CO Alarm” button. Briefly press the Sentry’s power button to cancel the alarm test. Press “Mute Sentry for 5m” to mute the Sentry for a 5 minute period.

Download Sentry debug logs. Use this to save Sentry logs to your device to share with ForeFlight’s Pilot Support Team, if requested for troubleshooting.
Wi-Fi Settings. This sub-menu allows you to hide the Sentry WiFi network (SSID Broadcast), or to add a password to the Sentry WiFi network (WPA2 Security Enabled). This can be useful for airline or military operations, when you don’t want passengers connecting to your Sentry, but can be ignored for most other flights. If in doubt, leave the SSID Broadcast on and the WPA2 Security off.

Calibrate AHRS and change mounting location. If you would like to calibrate the AHRS, change mounting location or change your preference for Auto Zero Pitch and Bank, enable the attitude indicator and tap the Settings button in the lower-left corner of the attitude display. This will display the Sentry AHRS Setup options.

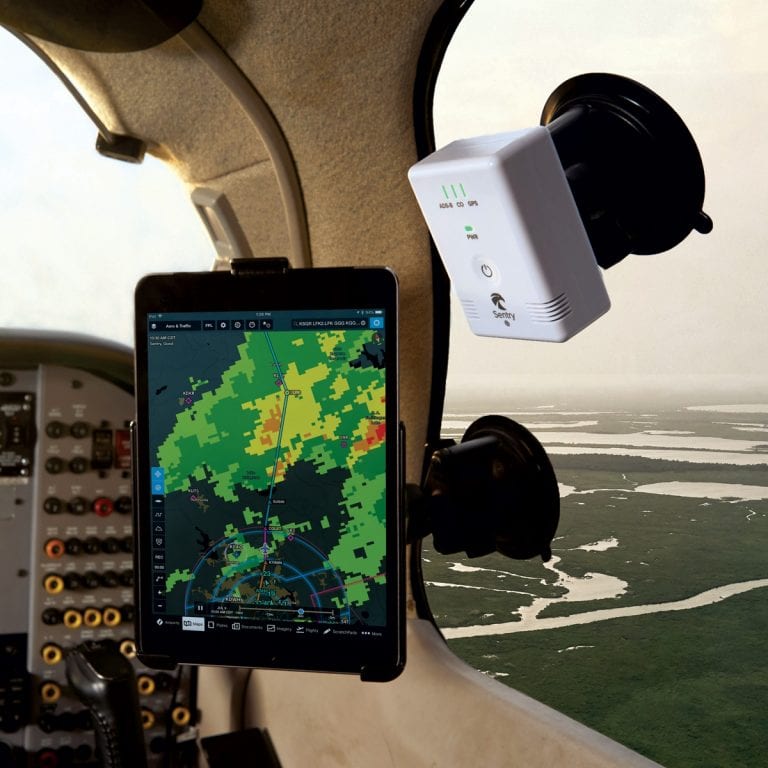
One last piece of advice – you’ll find it worthwhile to mount Sentry in a location which keeps that status lights in view, as they’ll provide helpful status indication for ADS-B reception, GPS reception, power status and CO monitoring:

You can learn more about the Sentry ADS-B receiver for ForeFlight and purchase here.
The post Understanding Sentry ADS-B settings appeared first on iPad Pilot News.
Source: Ipad appsUnderstanding Sentry ADS-B settings