

Appareo released the Stratus 3 ADS-B receiver last month, building on the success and reliability of previous-generation Stratus receivers. One of the big changes over previous models is that it added support for apps other than ForeFlight allowing it to provide subscription-free ADS-B weather and traffic to apps like FltPlan Go, WingX Pro and FlyQ.
While Stratus 3 works right out of the box with ForeFlight, there are a few additional things you’ll need to do first to get it linked up with one of these apps. Here we’ll show the connection process when using Stratus 3 with FltPlan Go and how to view the ADS-B traffic and weather layers in the app.
Step 1: Enable Open ADS-B Mode on Stratus 3
Before connecting Stratus 3 to a compatible EFB app other than ForeFlight, you’ll first need to enable the GDL 90 mode on the device. This requires you to download Appareo’s free Stratus Horizon Pro app from the app store to configure the setting. After the app downloads, turn on Stratus 3 and connect your iPad to the Stratus WiFi. Open up the Stratus Horizon app, and tap the Settings button in the lower left corner. You’ll see Stratus Settings on the left side of the screen, with a toggle for Open ADS-B Mode – turn this on. Stratus 3 is now ready to connect to other EFB apps.

Step 2: Connect FltPlan Go to Stratus 3
When you first launch FltPlan Go and go to the ADS-B section of the Maps screen, you’ll see a message instructing you to connect your ADS-B unit:

Tap the “External” button on the left side of the screen, and you’ll see a list of compatible ADS-B receivers. Select Stratus 3, and you’ll instantly see connection stats, Stratus 3 details and ADS-B status.

Step 3: Displaying ADS-B weather in FltPlan Go
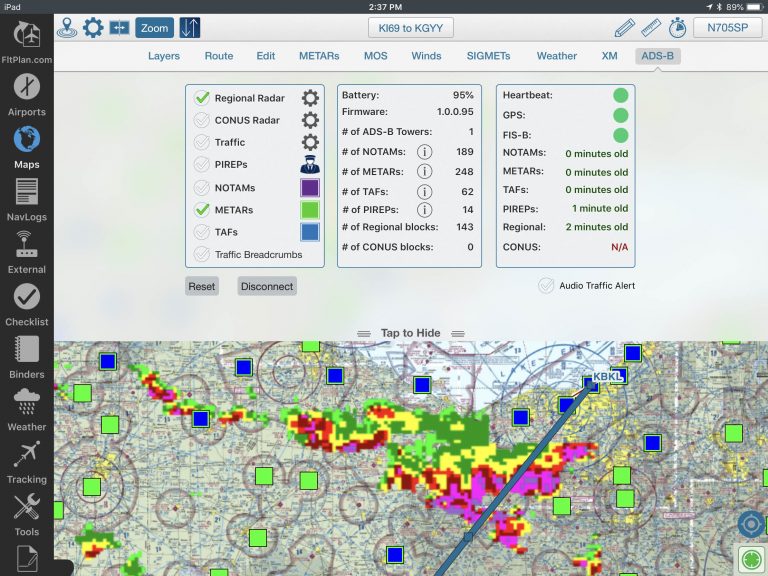
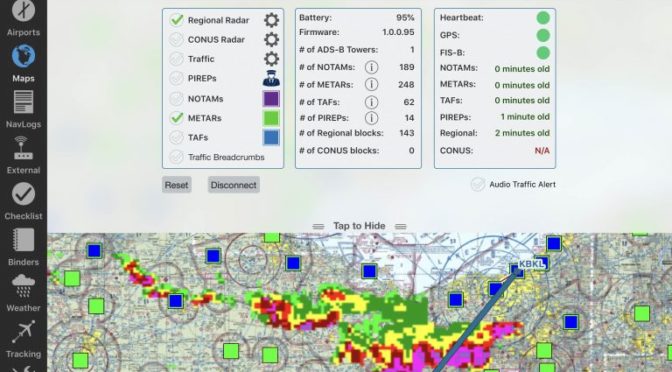
To display ADS-B weather on the map, you’ll use the layer options under the ADS-B tab, not the internet-based METAR, SIGMETs and Weather buttons across the middle of the screen. After selecting ADS-B, you’ll see weather layer options on the left side of the screen:

Tap the circle next to each layer name to enable the respective weather type. Regional radar features the highest resolution and will be displayed within 250 NM of your present location. It’s not quite as crisp as you’ll find in other apps, but that’s really not a limitation since ADS-B datalink radar shouldn’t be used tight navigation around convective weather:

ADS-B METARs are depicted with square symbols, and not the small circles you’re used to seeing when connected to the internet. Tap one to get the full text report:

You can also view METARs and TAFs in flight on the Airports screen:

PIREPs are shown with a small cartoon pilot symbol on the map and can be tapped to show the full report:

The traffic layer will display nearby aircraft, and the inner-circle is color-coded based on proximity to your current altitude:

Tap one of the targets for additional information:

Stratus 3 is available now for a $699 introductory price. Read our full review on it here.
FltPlan Go is completely free and can be downloaded from the app store.
The post Flying with Stratus 3 and the FltPlan Go app appeared first on iPad Pilot News.
Source: Ipad appsFlying with Stratus 3 and the FltPlan Go app